系统环境
centos 7.4 , nginx 1.14.0 , modsecurity-v3.0.2.tar.gz
安装依赖库
yum install gcc-c++ flex bison yajl yajl-devel curl-devel curl GeoIP-devel doxygen zlib-devel GeoIP-data GeoIP
yum install gcc-c++ flex bison curl-devel curl libxml2-devel doxygen zlib-devel git automake libtool pcre-devel
编译libModSecurity
cd /data
###################################################### |
git clone https://github.com/SpiderLabs/ModSecurity    |
cd ModSecurity                                         |
git checkout -b v3/master origin/v3/master             |  官方直接用这种方式安装,经过多次测试效果不好,
sh build.sh                                            |  建议用下面这个下载后编译。
git submodule init                                     |
git submodule update                                   |
###################################################### |

wget https://github.com/SpiderLabs/ModSecurity/releases/download/v3.0.2/modsecurity-v3.0.2.tar.gz
tar -zxvf modsecurity-v3.0.2.tar.gz
mv modsecurity-v3.0.2 ModSecurity
cd ModSecurity
./configure
make
make install
安装完成后路径在
/usr/local/modsecurity/lib
安装nginx connector组件
export MODSECURITY_INC="/data/ModSecurity/headers/"
export MODSECURITY_LIB="/data/ModSecurity/src/.libs/"
cd /data
git clone https://github.com/SpiderLabs/ModSecurity-nginx
[root@10-9-168-43 soft]# nginx -V
nginx version: nginx/1.14.0
built by gcc 4.8.5 20150623 (Red Hat 4.8.5-16) (GCC)
built with OpenSSL 1.0.2k-fips 26 Jan 2017
TLS SNI support enabled
configure arguments: --prefix=/etc/nginx --sbin-path=/usr/sbin/nginx --modules-path=/usr/lib64/nginx/modules --conf-path=/etc/nginx/nginx.conf --error-log-path=/var/log/nginx/error.log --http-log-path=/var/log/nginx/access.log --pid-path=/var/run/nginx.pid --lock-path=/var/run/nginx.lock --http-client-body-temp-path=/var/cache/nginx/client_temp --http-proxy-temp-path=/var/cache/nginx/proxy_temp --http-fastcgi-temp-path=/var/cache/nginx/fastcgi_temp --http-uwsgi-temp-path=/var/cache/nginx/uwsgi_temp --http-scgi-temp-path=/var/cache/nginx/scgi_temp --user=nginx --group=nginx --with-compat --with-file-aio --with-threads --with-http_addition_module --with-http_auth_request_module --with-http_dav_module --with-http_flv_module --with-http_gunzip_module --with-http_gzip_static_module --with-http_mp4_module --with-http_random_index_module --with-http_realip_module --with-http_secure_link_module --with-http_slice_module --with-http_ssl_module --with-http_stub_status_module --with-http_sub_module --with-http_v2_module --with-mail --with-mail_ssl_module --with-stream --with-stream_realip_module --with-stream_ssl_module --with-stream_ssl_preread_module --with-cc-opt='-O2 -g -pipe -Wall -Wp,-D_FORTIFY_SOURCE=2 -fexceptions -fstack-protector-strong --param=ssp-buffer-size=4 -grecord-gcc-switches -m64 -mtune=generic -fPIC' --with-ld-opt='-Wl,-z,relro -Wl,-z,now -pie'
官网下载nginx 对应源码版本
wget http://nginx.org/download/nginx-1.14.0.tar.gz
tar -zxvf nginx-1.14.0.tar.gz
cd nginx-1.14.0
复制上面nginx -V 输出的configure arguments 后面的参数,再添加--add-dynamic-module=/data/ModSecurity-nginx参数上去
[root@10-9-168-43 nginx-1.14.0]# ./configure --prefix=/etc/nginx --add-dynamic-module=/data/ModSecurity-nginx --sbin-path=/usr/sbin/nginx --modules-path=/usr/lib64/nginx/modules --conf-path=/etc/nginx/nginx.conf --error-log-path=/var/log/nginx/error.log --http-log-path=/var/log/nginx/access.log --pid-path=/var/run/nginx.pid --lock-path=/var/run/nginx.lock --http-client-body-temp-path=/var/cache/nginx/client_temp --http-proxy-temp-path=/var/cache/nginx/proxy_temp --http-fastcgi-temp-path=/var/cache/nginx/fastcgi_temp --http-uwsgi-temp-path=/var/cache/nginx/uwsgi_temp --http-scgi-temp-path=/var/cache/nginx/scgi_temp --user=nginx --group=nginx --with-compat --with-file-aio --with-threads --with-http_addition_module --with-http_auth_request_module --with-http_dav_module --with-http_flv_module --with-http_gunzip_module --with-http_gzip_static_module --with-http_mp4_module --with-http_random_index_module --with-http_realip_module --with-http_secure_link_module --with-http_slice_module --with-http_ssl_module --with-http_stub_status_module --with-http_sub_module --with-http_v2_module --with-mail --with-mail_ssl_module --with-stream --with-stream_realip_module --with-stream_ssl_module --with-stream_ssl_preread_module --with-cc-opt='-O2 -g -pipe -Wall -Wp,-D_FORTIFY_SOURCE=2 -fexceptions -fstack-protector-strong --param=ssp-buffer-size=4 -grecord-gcc-switches -m64 -mtune=generic -fPIC' --with-ld-opt='-Wl,-z,relro -Wl,-z,now -pie'
编译modules
make modules
编译完成的.so文件路径在当前目录下
./objs/ngx_http_modsecurity_module.so
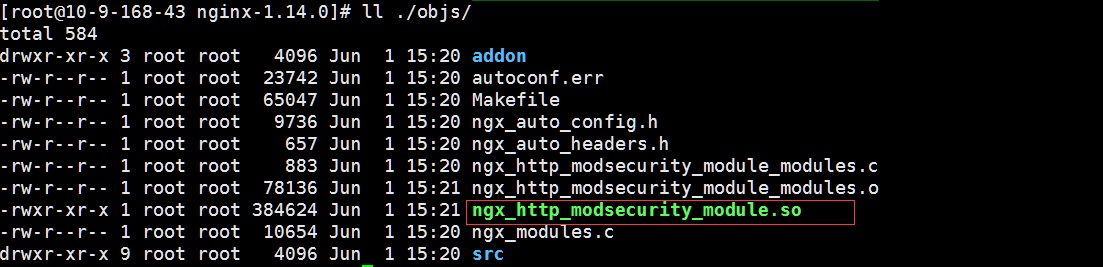
复制链接库
cp ./objs/ngx_http_modsecurity_module.so /etc/nginx/modules/
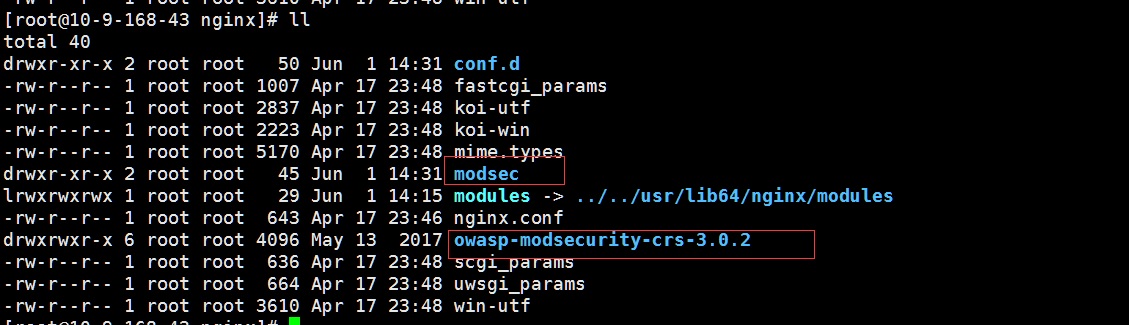
在nginx 配置文件目录下创建个modsecurity 配置文件目录
mkdir -p /etc/nginx/modsec
cd /etc/nginx
下载modsecurity 规则库
wget https://github.com/SpiderLabs/owasp-modsecurity-crs/archive/v3.0.2.tar.gz
tar -zxvf v3.0.2.tar.gz
 解压完后删除v3.0.2.tar.gz 包
rm -rf v3.0.2.tar.gz
cd owasp-modsecurity-crs-3.0.2
复制个配置文件为crs‑setup.conf
cp crs-setup.conf.example crs-setup.conf

cd /etc/nginx/modsec
wget https://raw.githubusercontent.com/SpiderLabs/ModSecurity/v3/master/modsecurity.conf-recommended
mv modsecurity.conf-recommended modsecurity.conf
查找
# SecRuleEngine DetectionOnly
替换为
SecRuleEngine On
_______________________________
创建 ModSecurity WAF 主配置文件,/etc/nginx/modsec/main.conf,用于引用modsecurity 所有相关配置文件,内容如下:
# Include the recommended configuration
Include /etc/nginx/modsec/modsecurity.conf

# A test rule
SecRule ARGS:testparam "@contains test" "id:1234,deny,log,status:403"

# OWASP CRS v3 rules
Include /etc/nginx/owasp-modsecurity-crs-3.0.2/crs-setup.conf
Include /etc/nginx/owasp-modsecurity-crs-3.0.2/rules/*.conf
_______________________________
修改nginx主配置文件
vim /etc/nginx/nginx.conf
增加一行,加载modsecurity.so 模块
load_module /etc/nginx/modules/ngx_http_modsecurity_module.so
创建测试配置文件
vi /etc/nginx/conf.d/echo.conf
server {
listen 0.0.0.0:8088;

location / {
modsecurity on;
modsecurity_rules_file /etc/nginx/modsec/main.conf;
default_type text/plain;
return 200 "Thank you for requesting ${request_uri}\n";
}
}
curl -i http://127.0.0.1:8088/foo?testparam=dalongtest
已被拦截
查看日志
tail -f /var/log/modsec_audit.log
---dG6xPLPF---A--
[01/Jun/2018:16:28:46 +0800] 152784172665.503402 127.0.0.1 40172 127.0.0.1 8088
---dG6xPLPF---B--
GET /foo?testparam=dalongtest HTTP/1.1
User-Agent: curl/7.29.0
Host: 127.0.0.1:8088
Accept: */*

---dG6xPLPF---D--

---dG6xPLPF---E--
<html>\x0d\x0a<head><title>403 Forbidden</title></head>\x0d\x0a<body bgcolor="white">\x0d\x0a<center><h1>403 Forbidden</h1></center>\x0d\x0a<hr><center>nginx/1.14.0</center>\x0d\x0a</body>\x0d\x0a</html>\x0d\x0a

---dG6xPLPF---F--
HTTP/1.1 403
Server: nginx/1.14.0
Date: Fri, 01 Jun 2018 08:28:46 GMT
Content-Length: 169
Content-Type: text/html
Connection: keep-alive

---dG6xPLPF---H--
ModSecurity: Access denied with code 403 (phase 1). Matched "Operator `Contains' with parameter `test' against variable `ARGS:testparam' (Value: `dalongtest' ) [file "/etc/nginx/modsec/main.conf"] [line "115"] [id "1234"] [rev ""] [msg ""] [data ""] [severity "0"] [ver ""] [maturity "0"] [accuracy "0"] [hostname "127.0.0.1"] [uri "/foo"] [unique_id "152784172665.503402"] [ref "o6,4v19,10"]

---dG6xPLPF---I--

---dG6xPLPF---J--

---dG6xPLPF---Z--


I think the admin of this website is actually working hard in favor of his
web page, because here every data is quality based information.
A person necessarily help to make significantly articles I might state.
That is the very first time I frequented your web page and
so far? I surprised with the research you made to create this particular put up incredible.
Fantastic task!